How to start a city blog like Go Visit Chicago…
Do you like to explore city? Do you like to read about reviews on restaurants, things to do, hotels, tips and advice about your favorite city? If yes then I am sure you must be coming across information about your favorite city that may not be correct.
Don’t you feel like start sharing honest opinion as you explore the city? If yes then what are you waiting for? If you are not feeling like writing about your favorite city right now then I insist you on considering the thought about blogging in near future! It is never late to start blogging about your favorite city!
Writing is very easy than you think and it has financial benefits! I am not kidding, your liking towards exploring your favorite city can earn you money! Yup, express your passion with writing and share it on your own personal city blog to make money online.
You may be fascinated with your own city or the city you visit more frequently for vacation or to meet friends and family! All you need is the passion for writing and sharing! Start a city blog and share your passion about the city you love to start earning passive monthly income!
It’s not tough, if I can write then sure you can! It’s easy to write about topics on what you see, what you do, where you eat and where you drink and share your personal experience on blog.
Do not wait, today might be your lucky day as you are reading my post – how to start a city blog!
I request you to focus reading for next few minutes carefully, as next few minutes of reading is going to give you enough information on how to start a city blog that can make you money online.
In fact, your blog doesn’t need to be about any city, this post will teach you how to start a blog to share your passion about anything that you like doing every day that can turn into steady income.

How to start a city blog in four simple steps…
Well, it sounds simple isn’t it? But, if you are looking for a steady monthly income blogging about your passion then I must say, you need lot of patience and dedication writing about things that you really enjoy! You will see money rolling in your bank once you build up readers and monetize your blog. Today I am going to explain how to start a blog in four easy steps.
You can follow these steps to start blog on any topic, any niche that interest you the most! Without passion you cannot be problogger.
Step 1: Register Domain Name
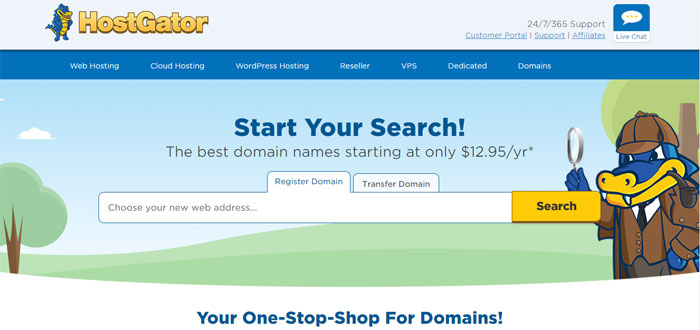
This is very important and first step towards your blogging journey. Before you go to Hostgator to register a domain name, keep in mind that your blog URL is going to be your identity. City bloggers must consider to include full city name while choosing domain name. Your domain name must be related to main content of your blog. For example, I love to blog about Chicago city so I ended up choosing GoVisitChicago.com
If you are planning to blog about famous city then you might have a little tough time finding domain name as most obvious ones must be already taken. Brainstorm ideas with friends and family to come up with some options.
Go to Hostgator domain registration page to check if domain name is available for registration. Be ready to do brainstorm exercise more than once if you cannot find the domain name that you are looking for your blog.
Note: There is a way to register domain and purchase Hostgator hosting package together but I will keep it simple for bloggers who are novice to this entire web blogging world.
Step 2: Purchase Hosting Package with Hostgator
Voila, now you have registered domain name for your blog! It’s time to rent a web space for your blog on Hostgator.
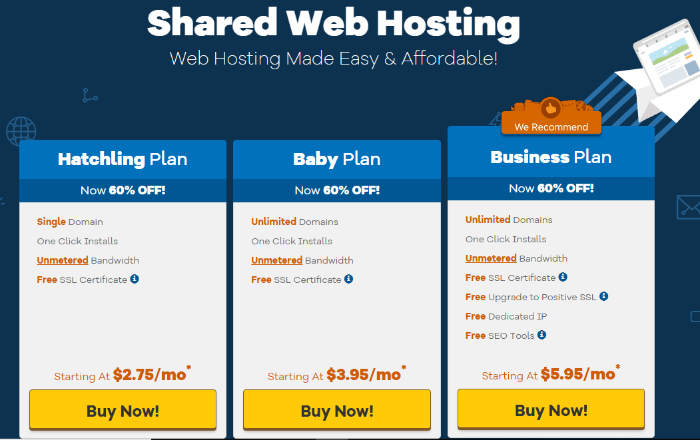
Go to Hostgator Web Hosting page to select the plan that fits your budget. I recommend to purchase basic plan that offers everything that is needed for your blog.
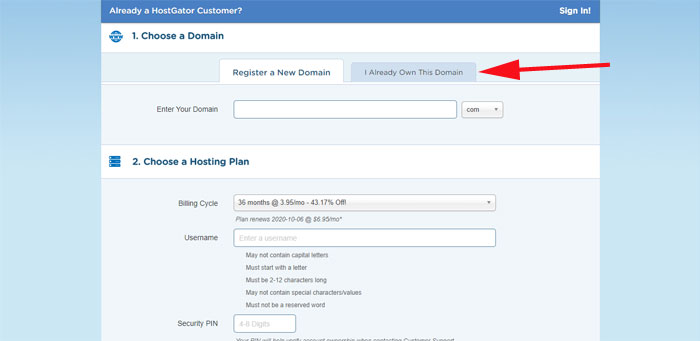
Once you click on Sign Up for Plan, you will be redirected to the signup page. On registration page you have option to register a domain name or use the domain name that you already own. If you already have registered domain name in Step#1 then click on “I already own this domain” tab to enter your blog URL.
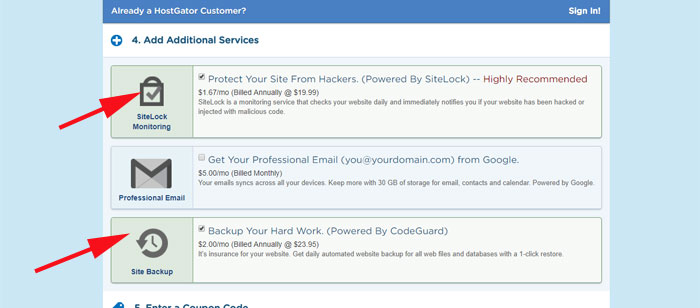
Fill out all necessary information and then scroll down to additional services section. I recommend you to add Sitelock Monitoring service to protect your site from Hackers and Site Backup service to backup your hard work. Refer following screen marked with red color arrow
Now, you have completed all steps to purchase Hostgator hosting package for your blog! It’s time to wait for an email notification from Hostgator with cPanel login credentials.
Hostgator will send email with all necessary login details once they have setup your hosting account.
Step 3: Install WordPress
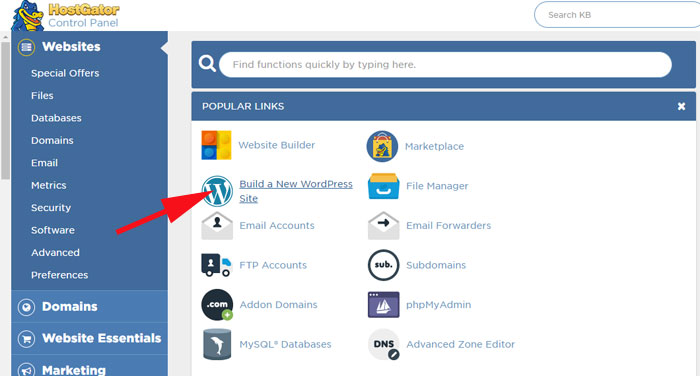
Login to your cPanel using the url and login credential from Hostgator. Under popular links section click on “Build a new WordPress website” that will take you to page where you can select your blog domain and create directory for your blog installation.
If your blog is going to be the primary focus of the website then I recommend you to create blog directly on root level directory. If you already have a website with different content and want to create blog as an additional content then create directory called “blog”.
I have installed wordpress on root level for my GoVisitChicago.com

Next screen you will be asked to provide blog title, first name, last name and administrator’s e-mail. Make sure to provide correct email address to receive wordpress installation confirmation with username and password details.
Make sure to select “automatically create fresh database for this install” checkbox.
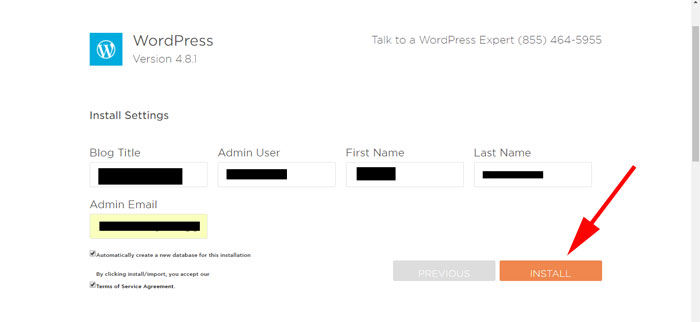
Accept terms and conditions and click on “Install” button! Wait until wordpress installation is complete and you get confirmation page with install details containing your blog url, username and password. You will receive same information in email.
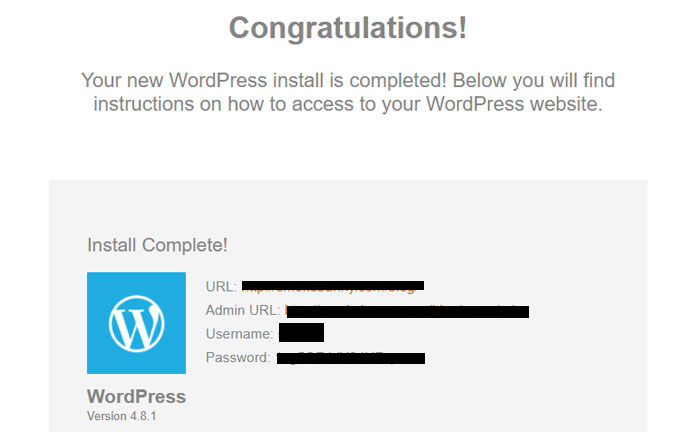
Login to your blog using provided login url. If you have installed blog on root level then your login url will look like http://www.yourblogurl.com/wp-admin/

Congratulations! You have successfully created your blog!
Step 4: Make your blog look good… time to refresh look & feel!
You own a blog now! There is one important final step you still have to complete before you start writing your first post to share. Your blog needs to look pretty!
Better looking blog will keep your blog visitors stay longer period of time on your site. There are many free wordpress themes that you can check for your blog appearance.
If you are looking for premium wordpress themes with support then check following few wordpress theme resources
Sahifa Theme – GoVisitChicago.com is running on Sahifa responsive theme. These days majority of readers are using smart phones or tablets to read blogs. Responsive themes are neat way to present your article on mobile devices.
Studio Press Theme – I started GoVisitChicago.com with magazine style Studio Press Theme and later on moved Go Visit Chicago to Sahifa Theme. There is nothing wrong about Studio Press Themes, I still recommend to use studio press themes if you like anyone of their designs.
Thesis Theme – I also like the modern look of Thesis Theme. This theme is also comes with responsive skins that can be changed easily.
I recommend to use premium wordpress themes for more flexibility to add your personal touch designing your blog.
Also, check out blogging resources for reference to blog efficiently!
Good Luck – It’s time to go out and express yourself blogging!